Setting up Kubernetes on Raspberry Pi 5 using NVMe drive and Talos
Today I will go though how we can set up an Kubernetes cluster on a Raspberry Pi 5 using Talos Linux.
Some background: Talos Linux is an immutable and secure by default Linux distribution that doesn't have unnecessary binaries for running Kubernetes which means that you cannot even use SSH to access it, which is a plus side IMO.
Due to the nature of how the Pi 5 works architecturally, we require the kernel from Raspberry Pi Foundation, as otherwise we cannot get even Ethernet working.
The good news is that there are Talos images for it due to a community effort to provide them so the only thing we need to get is their image instead.
The steps to flash the image to the NVMe involves either doing it before attaching the NVMe HAT, or while it's connected.
We are going to do it via Raspberry Pi OS.
Steps are as follows:
- Have an MicroSD card with Raspberry Pi OS Lite on it, or just flash it eg using Raspberry Pi Imager.
- Insert the SD-card to the Pi5, and grab your USB keyboard as well as a monitor.
- Press the power button or apply power and wait for it to boot fully.
- You should be presented with an UI that asks for a username and password to be set. Set those to something you will remember as you need them in a moment.
- After that has finished, the Pi might reboot again before letting you to log-in.
- After the reboot, log-in with the credentials
- Setup network via either wireless or Ethernet, I took the easier option which is Ethernet.
- Check that you see the NVMe drive at /dev/nvme0n1 with the help of
sudo fdisk -l - Download the image from https://github.com/talos-rpi5/talos-builder/releases/tag/v1.10.5-rpi5 under assets raw.zstd
- You need to decompress it before you can flash it, so do that with
zstd -d filename(replace filename with the files actual name) - We then need to flash it with
sudo dd if=filename of=/dev/nvme0n1 status=progress bs=4Mafter that completes we still need to make sure boot order is right. - We use the utility
sudo raspi-configand it might look something like:
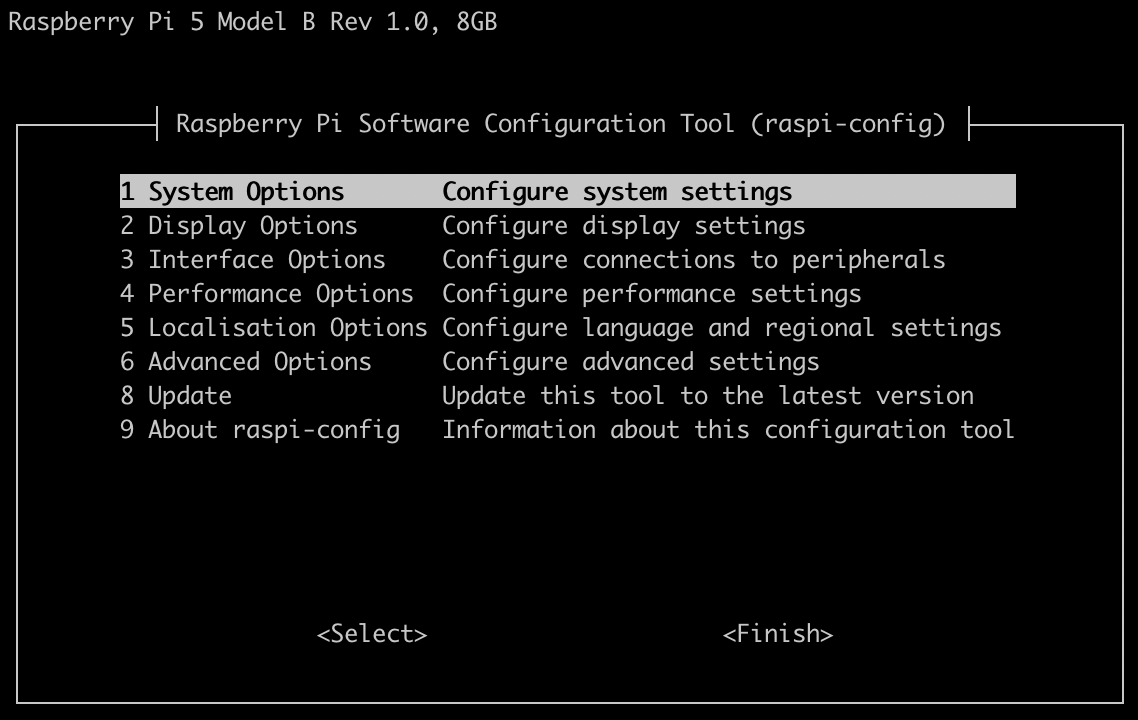
We go to option 6:
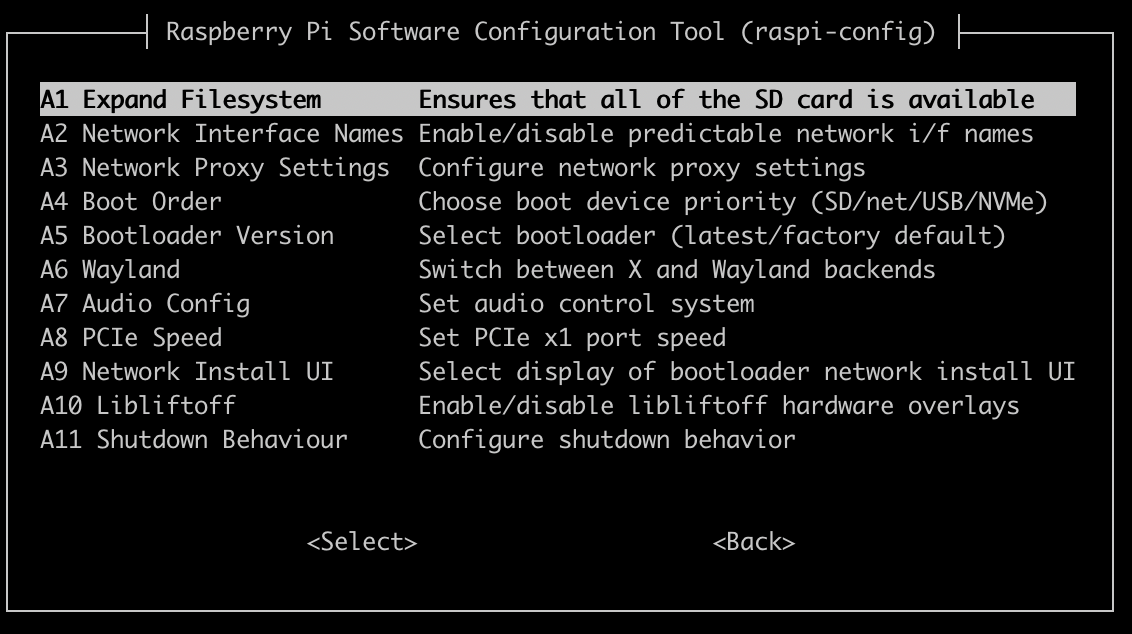
And then finally A4:
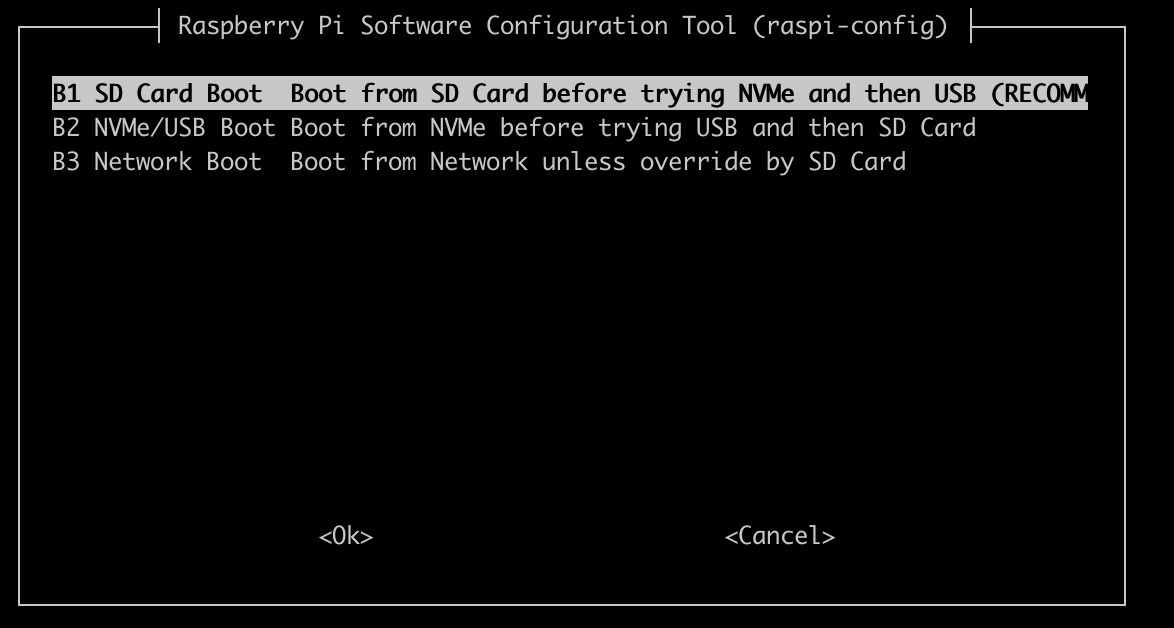
And B2 is the right one so move with arrow buttons to it and OK and you should be returned to main menu where you can finally click Finish and might prompt to reboot, so do that and eject SD card. It should boot from NVMe.
NOTE: You may not be able to see anything in serial console after.
Talos setup
Before continuing, you will need to download talosctl from the assets to your platform.
Now that talos has booted and we have talosctl, we need to make sure to actually install it.
We need to first check it sees our disk:
$ talosctl get disks -n 192.168.2.19 --insecure
NODE   NAMESPACE   TYPE   ID        VERSION   SIZE     READ ONLY   TRANSPORT   ROTATIONAL   WWID                                   MODEL                SERIAL
       runtime     Disk   loop0     2         26 MB    true
       runtime     Disk   loop1     2         74 MB    true
       runtime     Disk   nvme0n1   2         500 GB   false       nvme                     eui.00000000000000000026b7785d416b85   KINGSTON SNV3S500G   <snip>
talosctl get disks --insecure
Open the interactive installer: talosctl apply-config --insecure --mode=interactive --nodes 192.168.2.19 and went it asks for the installer image, use ghcr.io/talos-rpi5/installer:v1.10.5-rpi5. Remember to select the NVMe.
Get your kubeconfig: talosctl kubeconfig -n 192.168.2.19.
After which your single-node cluster is done. Congrats! You can now deploy apps and things. 😸
This is the output of kubectl get pods -A:
NAMESPACE     NAME                            READY   STATUS    RESTARTS        AGE
kube-system   coredns-78d87fb69b-n6dpj        1/1     Running   0               2m34s
kube-system   coredns-78d87fb69b-tqclw        1/1     Running   0               2m34s
kube-system   kube-apiserver-pi5-1            1/1     Running   0               2m29s
kube-system   kube-controller-manager-pi5-1   1/1     Running   2 (2m58s ago)   2m29s
kube-system   kube-flannel-g4rzj              1/1     Running   0               2m30s
kube-system   kube-proxy-t5mqb                1/1     Running   0               2m30s
kube-system   kube-scheduler-pi5-1            1/1     Running   2 (3m1s ago)    2m29s
References & Attributions
-
Talos Linux Documentation. "What is Talos?" Sidero Labs. https://www.talos.dev/v1.10/introduction/what-is-talos/
-
Talos Linux Community. "Talos Builder for Raspberry Pi 5." GitHub. https://github.com/talos-rpi5/talos-builder/releases/tag/v1.10.5-rpi5
-
Sidero Labs. "Talos Linux Releases." GitHub. https://github.com/siderolabs/talos/releases/tag/v1.10.6
-
Kubernetes Contributors. "Logo Usage Guidelines." GitHub. https://github.com/kubernetes/kubernetes/blob/master/logo/usage_guidelines.md
Copyright Notice
- All screenshots are original work by the author
- Talos Linux is licensed under Mozilla Public License 2.0
- Kubernetes® is a registered trademark of The Linux Foundation